
In this article, you will learn about Selenium JUnit integration in your testing framework. We will also look at how to integrate the JUnit report at the end. In the last article, you have seen how to write a selenium test case without using any approach.
After Selenium JUnit Integration, the testers can access the powerful automation capabilities of Selenium to write and execute automated tests in a familiar, JUnit-based environment. In the end, you will be able to write an automation framework using Selenium Junit and also able to generate a good-looking HTML report. First of all, we will see what is Junit.
Table of Contents
What is JUnit
JUnit is an open-source unit testing framework for the Java Programming Language. It plays an important role in Test Driven Development – TDD.
JUnit is a widely-used testing framework for Java that provides a set of annotations and assertions for writing and executing unit tests. By using JUnit with Selenium, developers and testers can write automated web tests in a structured, organized manner, and also benefit from the features of JUnit such as test runners, test results reporting, and test case execution order management.
Selenium JUnit Testing with Annotations
JUnit provides annotations to determine what actions should be performed by a particular method. It also allows a tester to organize the groups, test-cases. Selenium allows the integration of JUnit. We can write selenium tests within JUnit test classes.
JUnit Annotations
JUnit provides some annotations and each annotation has its own meaning in testing. You can find the most common JUnit annotations below –
1 – @BeforeClass – Specifies that the method will be executed only once, before starting all the tests in that class.
2 – @Before – Specifies that the method will be executed before each test in that class.
3 – @AfterClass – Specifies that the method will be executed only once, after ending all the tests in that class.
4 – @After – Specifies that the method will be executed after each test in that class.
5 – @Test – Specifies that the method is the JUnit test method.
JUnit Assert Class
JUnit also provides Assert Class. The Assert class provides methods to ensure that the code behaves as expected. The common methods of Assert Class are given below –
1 – assertEquals(Object expected, Object actual) – checks that given expected and actual values are equal or not.
2 – assertTrue(boolean condition) – checks whether that given condition is true or not.
3 – assertFalse(boolean condition) – checks whether that given condition is false or not.
Selenium Test using JUnit
Pre-Requisites
- Java Setup in your system
- Maven installed – Read the Maven Article
- Installed any IDE – We are using IntelliJ in this article.
Now follow the below steps to create JUnit-based tests –
Setup a new Maven Project in IntelliJ
You can create the maven project in IntelliJ IDE while following the same steps as the previous article.
Adding JUnit Maven Dependency
Add the below dependency in pom.xml file for JUnit. And after that reload the maven project again.
<dependency>
   	<groupId>junit</groupId>
   	<artifactId>junit</artifactId>
   	<version>4.11</version>
</dependency>
Create the Test package and Test class
Step 1 – Create a new Package under src/test/java folder – seleniumTest

Step 2 – Create a new Test class under src/test/java/seleniumTest package – JUnitE2ETest.

Step 3 – Create a resources folder in src/test folder. And put the chrome driver in that src/test/resources folder.

Download your browser-compatible chrome driver from here.

Step 4 – Now, we add @BeforeClass annotation and write that code which we need to run once before starting the tests. So we will add the driver initialization part in that method.
And we need to declare the WebDriver object outside the method so that it can be accessible in all the methods.
@BeforeClass
public static void initializeDriver() {
    try {
        System.setProperty("webdriver.chrome.driver", "src/test/resources/chromedriver.exe");
        driver = new ChromeDriver();
        driver.manage().window().maximize();
        driver.manage().timeouts().implicitlyWait(Duration.ofSeconds(20));
    } catch (Exception e) {
        System.out.println("Error occurs while initializing the driver.");
        e.printStackTrace();
    }
}
Step 5 – Now, we add @AfterClass annotation and within that, we write the code that needs to be executed after all the tests. So we will add the driver closing code in that part.
@AfterClass
public static void closeDriver() {
    try {
        if (driver != null) {
            driver.quit();
        }
    } catch (Exception e) {
        System.out.println("Error occurs while closing the driver.");
        e.printStackTrace();
    }
}
Step 6 – Now, we add @Test annotation and within that, we write the actual code for testing the application. We can write one or more test methods.
If you create more than one Junit test method using @Test annotation then It will be executed according to a specific order. By default JUnit 4 compares test methods using their hash codes and accordingly executes the test methods. You can set the order by using the @FixMethodOrder annotation before the className.
- @FixMethodOrder(MethodSorters.DEFAULT) – Default Order according to the hashcode of the test methods.
- @FixMethodOrder(MethodSorters.JVM) – Utilizes the natural JVM ordering and executing order can be different for each execution. Each time you will get a different result.
- @FixMethodOrder(MethodSorters.NAME_ASCENDING) – Execute in ascending order according to their test methods name.
JUnit 5 comes with @Order tag which allows us to execute the test methods in a custom order.
In this Selenium Test Class, we are using MethodSorters.NAME_ASCENDING strategy and creating Test methods with the numerical value.
@Test
public void T1_launchApplication() {
    try {
        driver.get("https://www.saucedemo.com/");
    } catch (Exception e) {
        System.out.println("Error occurs in method T1_launchApplication().");
        e.printStackTrace();
    }
}
Complete Selenium Test using JUnit
Test Scenario – Login into the application and complete checkout of a product using Selenium JUnit.
Demo Test Website – https://www.saucedemo.com/
Create other methods like this and use the @tag before all the methods. You can see the complete code below –
package seleniumTest;

import org.junit.AfterClass;
import org.junit.BeforeClass;
import org.junit.FixMethodOrder;
import org.junit.Test;
import org.junit.runners.MethodSorters;
import org.openqa.selenium.By;
import org.openqa.selenium.WebDriver;
import org.openqa.selenium.WebElement;
import org.openqa.selenium.chrome.ChromeDriver;
import org.openqa.selenium.support.ui.ExpectedConditions;
import org.openqa.selenium.support.ui.WebDriverWait;

import java.time.Duration;
import java.util.List;

import static org.junit.Assert.assertEquals;

@FixMethodOrder(MethodSorters.NAME_ASCENDING)
public class JUnitE2ETest {

    public static WebDriver driver = null;
    public static String productName = "Sauce Labs Onesie";


    @BeforeClass
    public static void initializeDriver() {
        try {
            System.setProperty("webdriver.chrome.driver", "src/test/resources/chromedriver.exe");
            driver = new ChromeDriver();
            driver.manage().window().maximize();
            driver.manage().timeouts().implicitlyWait(Duration.ofSeconds(20));
        } catch (Exception e) {
            System.out.println("Error occurs while initializing the driver.");
            e.printStackTrace();
        }
    }

    @Test
    public void T1_launchApplication() {
        try {
            driver.get("https://www.saucedemo.com/");
        } catch (Exception e) {
            System.out.println("Error occurs in method T1_launchApplication().");
            e.printStackTrace();
        }
    }

    @Test
    public void T2_loginToApplication() {
        try {
            WebElement input_username = driver.findElement(By.id("user-name"));
            input_username.sendKeys("standard_user");
            WebElement input_password = driver.findElement(By.id("password"));
            input_password.sendKeys("secret_sauce");
            WebElement button_login = driver.findElement(By.id("login-button"));
            button_login.click();
        } catch (Exception e) {
            System.out.println("Error occurs in method T2_loginToApplication().");
            e.printStackTrace();
        }
    }

    @Test
    public void T3_selectProduct() {
        try {
            List<WebElement> allProductsName = driver.findElements(By.className("inventory_item_name"));
            for (WebElement product : allProductsName) {
                if (product.getText().equals(productName)) {
                    product.click();
                    break;
                }
            }
        } catch (Exception e) {
            System.out.println("Error occurs in method T3_selectProduct().");
            e.printStackTrace();
        }
    }

    @Test
    public void T4_addToCart() {
        try {
            WebDriverWait wait = new WebDriverWait(driver, Duration.ofSeconds(10));
            wait.until(ExpectedConditions.elementToBeClickable(driver.findElement(By.id("back-to-products"))));
            WebElement label_productTitle = driver.findElement(By.className("inventory_details_name"));
            String productTitle = label_productTitle.getText();
            assertEquals(productName, productTitle);
            WebElement button_addToCart = driver.findElement(By.cssSelector("button[id^='add-to-cart']"));
            button_addToCart.click();
        } catch (Exception e) {
            System.out.println("Error occurs in method T4_addToCart().");
            e.printStackTrace();
        }
    }

    @Test
    public void T5_goToCartAndCheckout() {
        try {
            WebElement button_goToCart = driver.findElement(By.className("shopping_cart_link"));
            button_goToCart.click();
            WebElement button_checkout = driver.findElement(By.id("checkout"));
            button_checkout.click();
        } catch (Exception e) {
            System.out.println("Error occurs in method T5_goToCartAndCheckout().");
            e.printStackTrace();
        }
    }

    @Test
    public void T6_fillTheForm() {
        try {
            String firstName = "Shubham";
            String lastName = "Kumar";
            String zipCode = "123455";
            WebElement input_firstName = driver.findElement(By.id("first-name"));
            input_firstName.sendKeys(firstName);
            WebElement input_lastName = driver.findElement(By.id("last-name"));
            input_lastName.sendKeys(lastName);
            WebElement input_zipCode = driver.findElement(By.id("postal-code"));
            input_zipCode.sendKeys(zipCode);
            WebElement button_continue = driver.findElement(By.id("continue"));
            button_continue.click();
        } catch (Exception e) {
            System.out.println("Error occurs in method T6_fillTheForm().");
            e.printStackTrace();
        }
    }

    @Test
    public void T7_completeCheckout() {
        try {
            WebElement label_productTitleOnCheckout = driver.findElement(By.className("inventory_item_name"));
            String productTitle = label_productTitleOnCheckout.getText();
            assertEquals(productName, productTitle);
            WebElement button_finish = driver.findElement(By.id("finish"));
            button_finish.click();
        } catch (Exception e) {
            System.out.println("Error occurs in method T7_completeCheckout().");
            e.printStackTrace();
        }
    }

    @Test
    public void T8_confirmTheOrder() {
        try {
            String expectMessage = "THANK YOU FOR YOUR ORDER";
            WebElement label_completeMessage = driver.findElement(By.className("complete-header"));
            String actualMessage = label_completeMessage.getText();
            assertEquals(expectMessage, actualMessage);
        } catch (Exception e) {
            System.out.println("Error occurs in method T8_confirmTheOrder().");
            e.printStackTrace();
        }
    }

    @AfterClass
    public static void closeDriver() {
        try {
            if (driver != null) {
                driver.quit();
            }
        } catch (Exception e) {
            System.out.println("Error occurs while closing the driver.");
            e.printStackTrace();
        }
    }
}
Running the Test
To run the test case do right-click on your Java file and click on run. It will start executing –

JUnit Reporting
JUnit also provides reporting to see the test overview. We just need to add plugins inside the pom.xml file and it will generate a good-looking report.
1. Add Plugin
<project>
    . . .
    <build>
        <plugins>

            <plugin>
                <groupId>org.apache.maven.plugins</groupId>
                <artifactId>maven-site-plugin</artifactId>
                <version>3.7.1</version>
            </plugin>

            <plugin>
                <groupId>org.apache.maven.plugins</groupId>
                <artifactId>maven-project-info-reports-plugin</artifactId>
                <version>3.0.0</version>
            </plugin>

        </plugins>
    </build>
    . . .
</project>
2. Set the Goal and run the command
mvn surefire-report:reportIt will create a report inside target/surefire-reports folder and you can open the HTML report file from target/site/surefire-report.html in any browser. It will look like this –

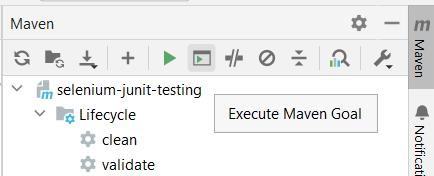
This report looks very simple. Now execute the below command in the maven goal. It will create a maven JUnit report with good-looking CSS and all features.
mvn clean surefire-report:report siteIt will create a report inside target/surefire-reports folder and you can open the HTML report file from target/site/surefire-report.html in any browser. It will look like this –

Conclusion
JUnit is an open-source testing framework that can be easily integrated with the Selenium Testing Framework. It is the unit testing framework for the Java language. You can create test methods and execute them using JUnit and can create the report at the end. Overall, Selenium JUnit integration is an effective approach for automating web testing. Till now, you have seen how we can convert our selenium tests into JUnit. In the next article, we will do the same with another popular testing framework i.e. TestNG.
Resources
You might Like
💖 If you like this article please make sure to Like, Comment, and Share it with your friends and colleagues.
Follow us on our social networks –