In this article, we will see about Maven Introduction. This article is best fit for beginners to help with the basic understanding of the Maven tool. If you are a Java Developer, you definitely spend your time in writing code, compiling code, testing, and, packaging code in different artifacts like JAR, WAR, and EAR. Apache Maven automates all the above tasks and minimizes manual overhead.
Table of Contents
What is Maven?
Apache Maven is Project Management Tool that provides developers with a complete build lifecycle framework. Maven is used to managing projects which are developed using JVM languages like Java, or Groovy, etc. It provides developers with a comprehensive, maintainable, reusable, and simple model for projects.
✅ Read the Previous Article: 5 Best Automation Tools in 2023
Maven Evolution
Maven was designed in Jakarta Turbine Project to simplify the building process. Most of the project contained ANT files, so Apache developed Maven to handle building multiple projects together, publish, deploy, and share JAR across several projects.
Maven Objective
The main objective of Maven is to provide developers with –
- A comprehensive model of projects, which is easy to maintain, reusable, and easy to understand.
- A set of tools and plugins, than can interact with this model.
Maven Features
Maven is contained many valuable and useful features. Here are some of the Maven’s common features –
- Dependency management with an auto-update feature.
- A huge and continuously growing repository of libraries.
- Provides a simple project setup that follows the best practices.
- Automatic parent versioning and backward compatibility with the previous versions.
- Easy to write plugins using Java scripting languages.
- Able to build any number of projects into predefined output files like JAR, and WAR.
Maven Installation
You can easily download and Install Maven on Windows, Linux, or macOS platforms. In this article, we will see how to install Maven on Windows only. For other platforms steps will be the same.
- Download Java JDK
- Add
JAVA_HOMEin environment variable - Verify Java is installed
- Download Maven
- Add
MAVEN_HOMEin environment variable - Add maven path in environment variable
- Verify Maven is installed
Step 1 – Download Java JDK
- Download the JDK according to your machine, from the given website –https://www.oracle.com/java/technologies/downloads/
- Run the Installer and follow the installation instructions.
Step 2 – Add JAVA_HOME in environment variable
- After successfully installing, you can see the java folder under C:\Program Files\java location.
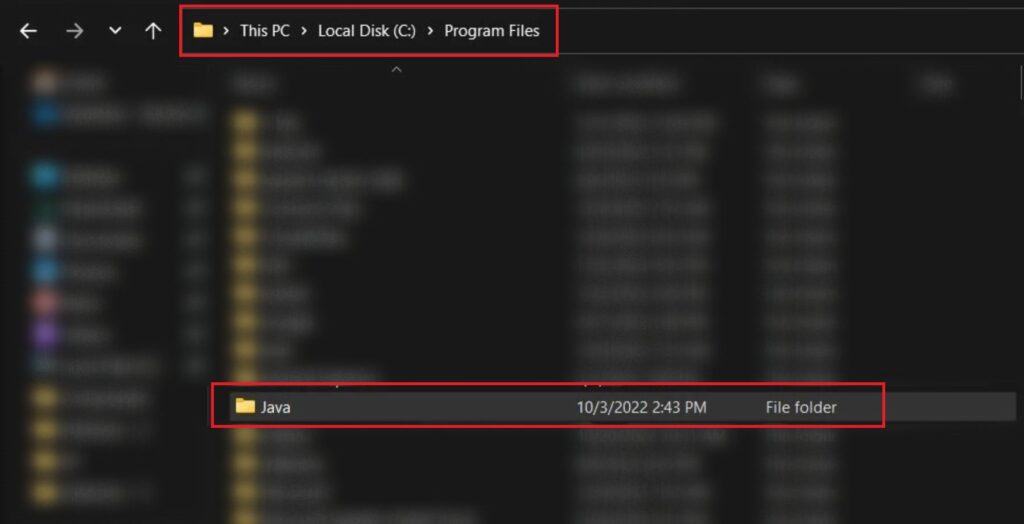
- Now, specify your JDK location in
JAVA_HOMEenvironment variable. For doing this go to “Control Panel”, then search for “environment variables”, then select “Edit the system environment variables” option, and then set the system variable values.
JAVA_HOME = "C:\Program Files\Java\jdk-X.X.X.X"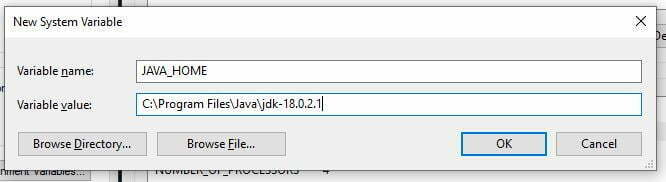
Step 3 – Verify Java is Installed
Open command prompt and type the follwoing command to verify installed Java on your machine.
java -version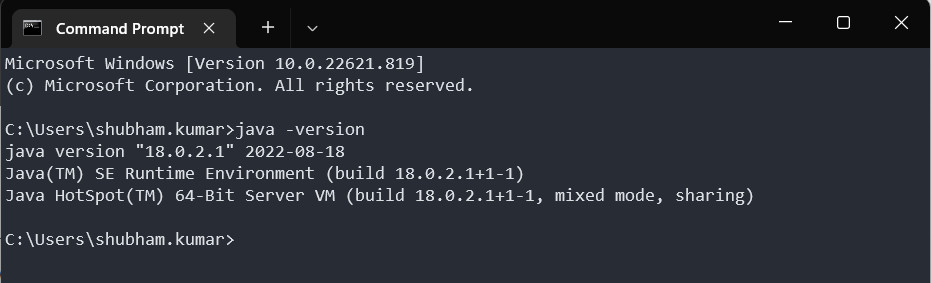
Step 4 – Download Maven
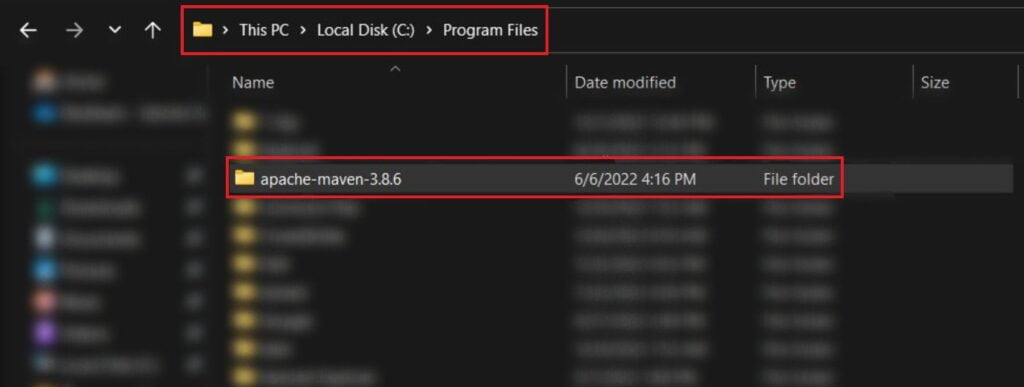
- Download the Maven according to your machine, from the given website –https://maven.apache.org/download.cgi
- Unzip the downloaded file and paste it to C:\Program Files location.
Step 5 – Add MAVEN_HOME in environment variable
Now, specify your MAVEN location in MAVEN_HOME environment variable. For doing this go to “Control Panel”, then search for “environment variables”, then select “Edit the system environment variables” option, and then set the system variable values.
MAVEN_HOME = "C:\Program Files\apache-maven-x.x.x"
Step 6 – Add maven path in environment variable
Now, in the path variable, add a new path to the maven bin directory.
path = "C:\Program Files\apache-maven-x.x.x\bin"Step 7 – Verify Maven is Installed
Open command prompt and type the follwoing command to verify installed Maven on your machine.
mvn -version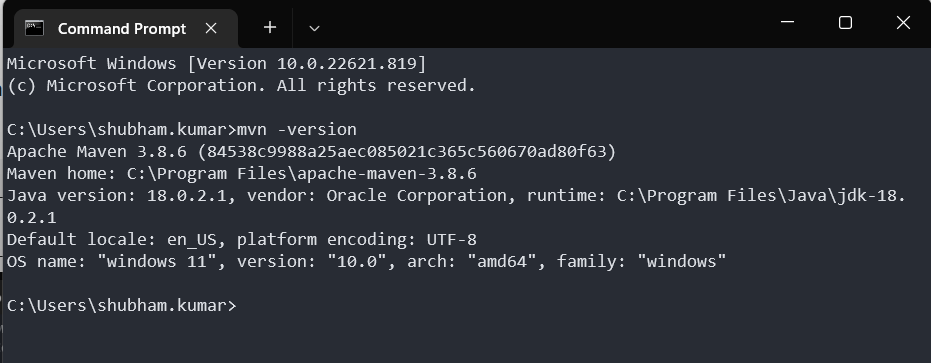
Maven Project Object Model (POM)
According to the maven – A Project Object Model or POM is the fundamental unit of work in Maven. It is an XML file that contains information about the project and configuration details used by Maven to build the project. It contains default values for most projects.
POM file or pom.xml file contains information and the configuration details of the project for maven to build the project such as the build directory, source directory, test source directory, plugins, dependencies, project version, goals, etc. It is located in the root directory of the project named – pom.xml.
All maven projects require a POM file in the root directory. And POM requires three mandatory fields i.e groupId, artifactId, and version.
Mandatory Elements of pom.xml File
- project – It is the maven project that contains pom.xml file.
- modelVersion – Model version should be set as 4.0.0
- groupId – It specifies the project’s group Id. For example – org.company
- artifactId – It specifies the project’s Id. Artifact i.e either produced or used by other projects. This is generally the name of the project. For example – AppName
- version – It specifies the project’s version. It is used with artifact to separate versions from each other. For example – 1.0.0 or 1.0-RELEASE
<?xml version="1.0" encoding="UTF-8"?>
<project xmlns="http://maven.apache.org/POM/4.0.0"
         xmlns:xsi="http://www.w3.org/2001/XMLSchema-instance"
         xsi:schemaLocation="http://maven.apache.org/POM/4.0.0 http://maven.apache.org/xsd/maven-4.0.0.xsd">
    <modelVersion>4.0.0</modelVersion>

    <groupId>org.example</groupId>
    <artifactId>sample-maven-project</artifactId>
    <version>1.0-SNAPSHOT</version>

</project>
Some Additional Elements of pom.xml File
- packaging – It specifies the packaging type of project such as JAR, WAR, etc.
- name – It specifies the name of the project. It can be similar to artifactId.
- url – It specifies the url of the project.
- dependencies – It contains all the dependencies that are going to be used in the project.
- dependency – It is used within dependencies. It specifies a single dependency.
- scope – It specifies the scope of any dependency for the maven project. It can be compile, test, provided, runtime, or system.
<?xml version="1.0" encoding="UTF-8"?>
<project xmlns="http://maven.apache.org/POM/4.0.0"
         xmlns:xsi="http://www.w3.org/2001/XMLSchema-instance"
         xsi:schemaLocation="http://maven.apache.org/POM/4.0.0 http://maven.apache.org/xsd/maven-4.0.0.xsd">
    <modelVersion>4.0.0</modelVersion>

    <groupId>org.example</groupId>
    <artifactId>sample-maven-project</artifactId>
    <version>1.0-SNAPSHOT</version>
    <packaging>jar</packaging>

    <name>sample-maven-project</name>
    <url>http://maven.apache.org</url>

    <dependencies>
        <dependency>
            <groupId>org.seleniumhq.selenium</groupId>
            <artifactId>selenium-java</artifactId>
            <version>4.4.0</version>
            <scope>test</scope>
        </dependency>
    </dependencies>

</project>
Types of POM File
There are three types of POM files that are given below –
- Simple POM File
- Super POM File
- Effective POM File
1. Simple POM File
This is the same pom.xml file that we have discussed above. It only contains relevant information about our current project.
2. Super POM File
It is the parent for all Simple POM Files. It contains a default configuration that is shared among all Simple POM files.
You can find the Super POM File in %MAVEN_HOME%/lib, and inside this location, you can find the JAR file maven-model-builder-x.x.x.jar.
⚠️ We should never try to change the Super POM file location, or name, or edit the same file.
3- Effective POM File
It is a combination of Simple and Super POM Files. It just checks all the information and configurations of pom.xml files in one place.
You can look for Effective POM for our pom.xml by using the following command –
mvn help:effective-pomIf you are using IntelliJ, then right-click on pom.xml and select maven > show effective pom.
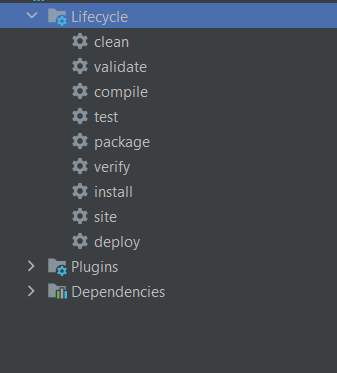
Maven Build Life Cycle
A build life cycle defines the order of sequence in which the goals are to be executed. Maven Build LifeCycle consists of the following phases –
- prepare-resource – Resource copying can be customized in this phase.
- validate – Validating the project’s necessary information
- compile – Compilation of the source code.
- test – Test the compiled source code.
- package – Create the JAR, and WAR packages as mentioned in the POM.
- install – Install the package in a local/remote repository.
- deploy – Deploy the final package to the remote repository.
Maven has some standard lifecycle steps that are following below –
- clean – It deletes the output of the build.
- build – Used to build the application.
- site – Used to create fresh documentation to create the reports, and deploy site.
Maven Repository
Maven Repository is a directory where all the JARs – project jar, library jar, and plugins are stored and Maven can use those jars easily. Maven searches for dependencies in the repository. There are three types of maven repositories –
- Local Repository
- Central Repository
- Remote Repository

Maven searches for the dependencies in a specific order – first is Local then Central and at the end Remote repository.
1. Maven Local Repository
It is located in our local system. It is automatically created when we run any maven command for the first time. You can find the local maven repository in C:\Users\user.name\.m2. When the maven project runs, It searches for the dependency in the local repository for the first time.
2. Maven Central Repository
It is located on the web. It is created by the apache maven community. It contains a large number of libraries. Whenever maven does not find the dependency in the local repository, it starts searching in the central repository. You can find the maven central repository – https://repo1.maven.org/maven2/.
3. Maven Remote Repository
It is also located on the web. Sometimes most of the dependencies are not found in the central repository then maven searches for those in the remote repository. It is also provided by the apache maven community. It’s the developer’s own repository that contains all required libraries.
Maven Plugins
Maven provides plugins to perform specific goals. Maven plugins are the central part of the maven framework. Maven plugins are generally used for –
- creating JAR / WAR file
- compiling code files
- creating project documents and project reports
Plugins generally provide a set of goals that can be executed by the given syntax –
mvn [plugin]:[goal]According to Apache Maven, plugins are of two types –
- Build Plugin – Declared inside
<build>element and executed at the time of build. - Report Plugin – Declared inside
<reporting>element and executed at the time of site generation.
Maven Core Plugin
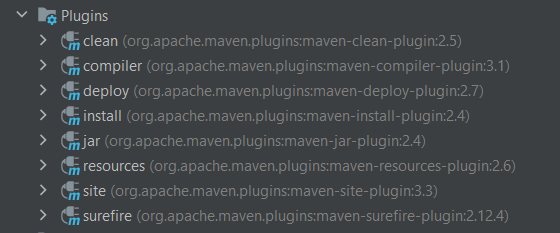
- clean – Used to clean up after the build.
- compiler – Used to compile the java source code.
- deploy – Used to deploy the artifact to the remote repository.
- install – Used to install the artifact into the local repository.
- resources – Used to copy the resources to the output directory.
- site – Used to generate the site for the current project.
- surefire – Used to run the JUnit tests and to create the test reports.
You can see the complete list of plugins on the apache maven official website.
Conclusion
This article is not completed yet. There are many things in apache maven to be covered. You can visit the official apache maven website for details. In this article, we have discussed maven, maven objectives, features, build life cycle, maven repositories, and plugins. I hope this information will help you to understand the basic concepts of maven. In the next maven article, we will see different examples of creating maven projects in different IDEs.
❤️ If you like this article please make sure to Like, Comment and Share it with your friends and colleagues
Follow us on our social networks –